


Email Notifications Setup
Stay Connected with Your Customers – Email notifications ensure both you and your customers stay informed about booking activities. This guide will help you configure admin alerts and SMTP settings for reliable email delivery.
📍 Accessing Notification Settings
To configure email notifications, click on Settings in the left sidebar menu, then select the Notifications tab.
1 Admin Alert Emails
Configure where you receive notifications about new bookings and system events:
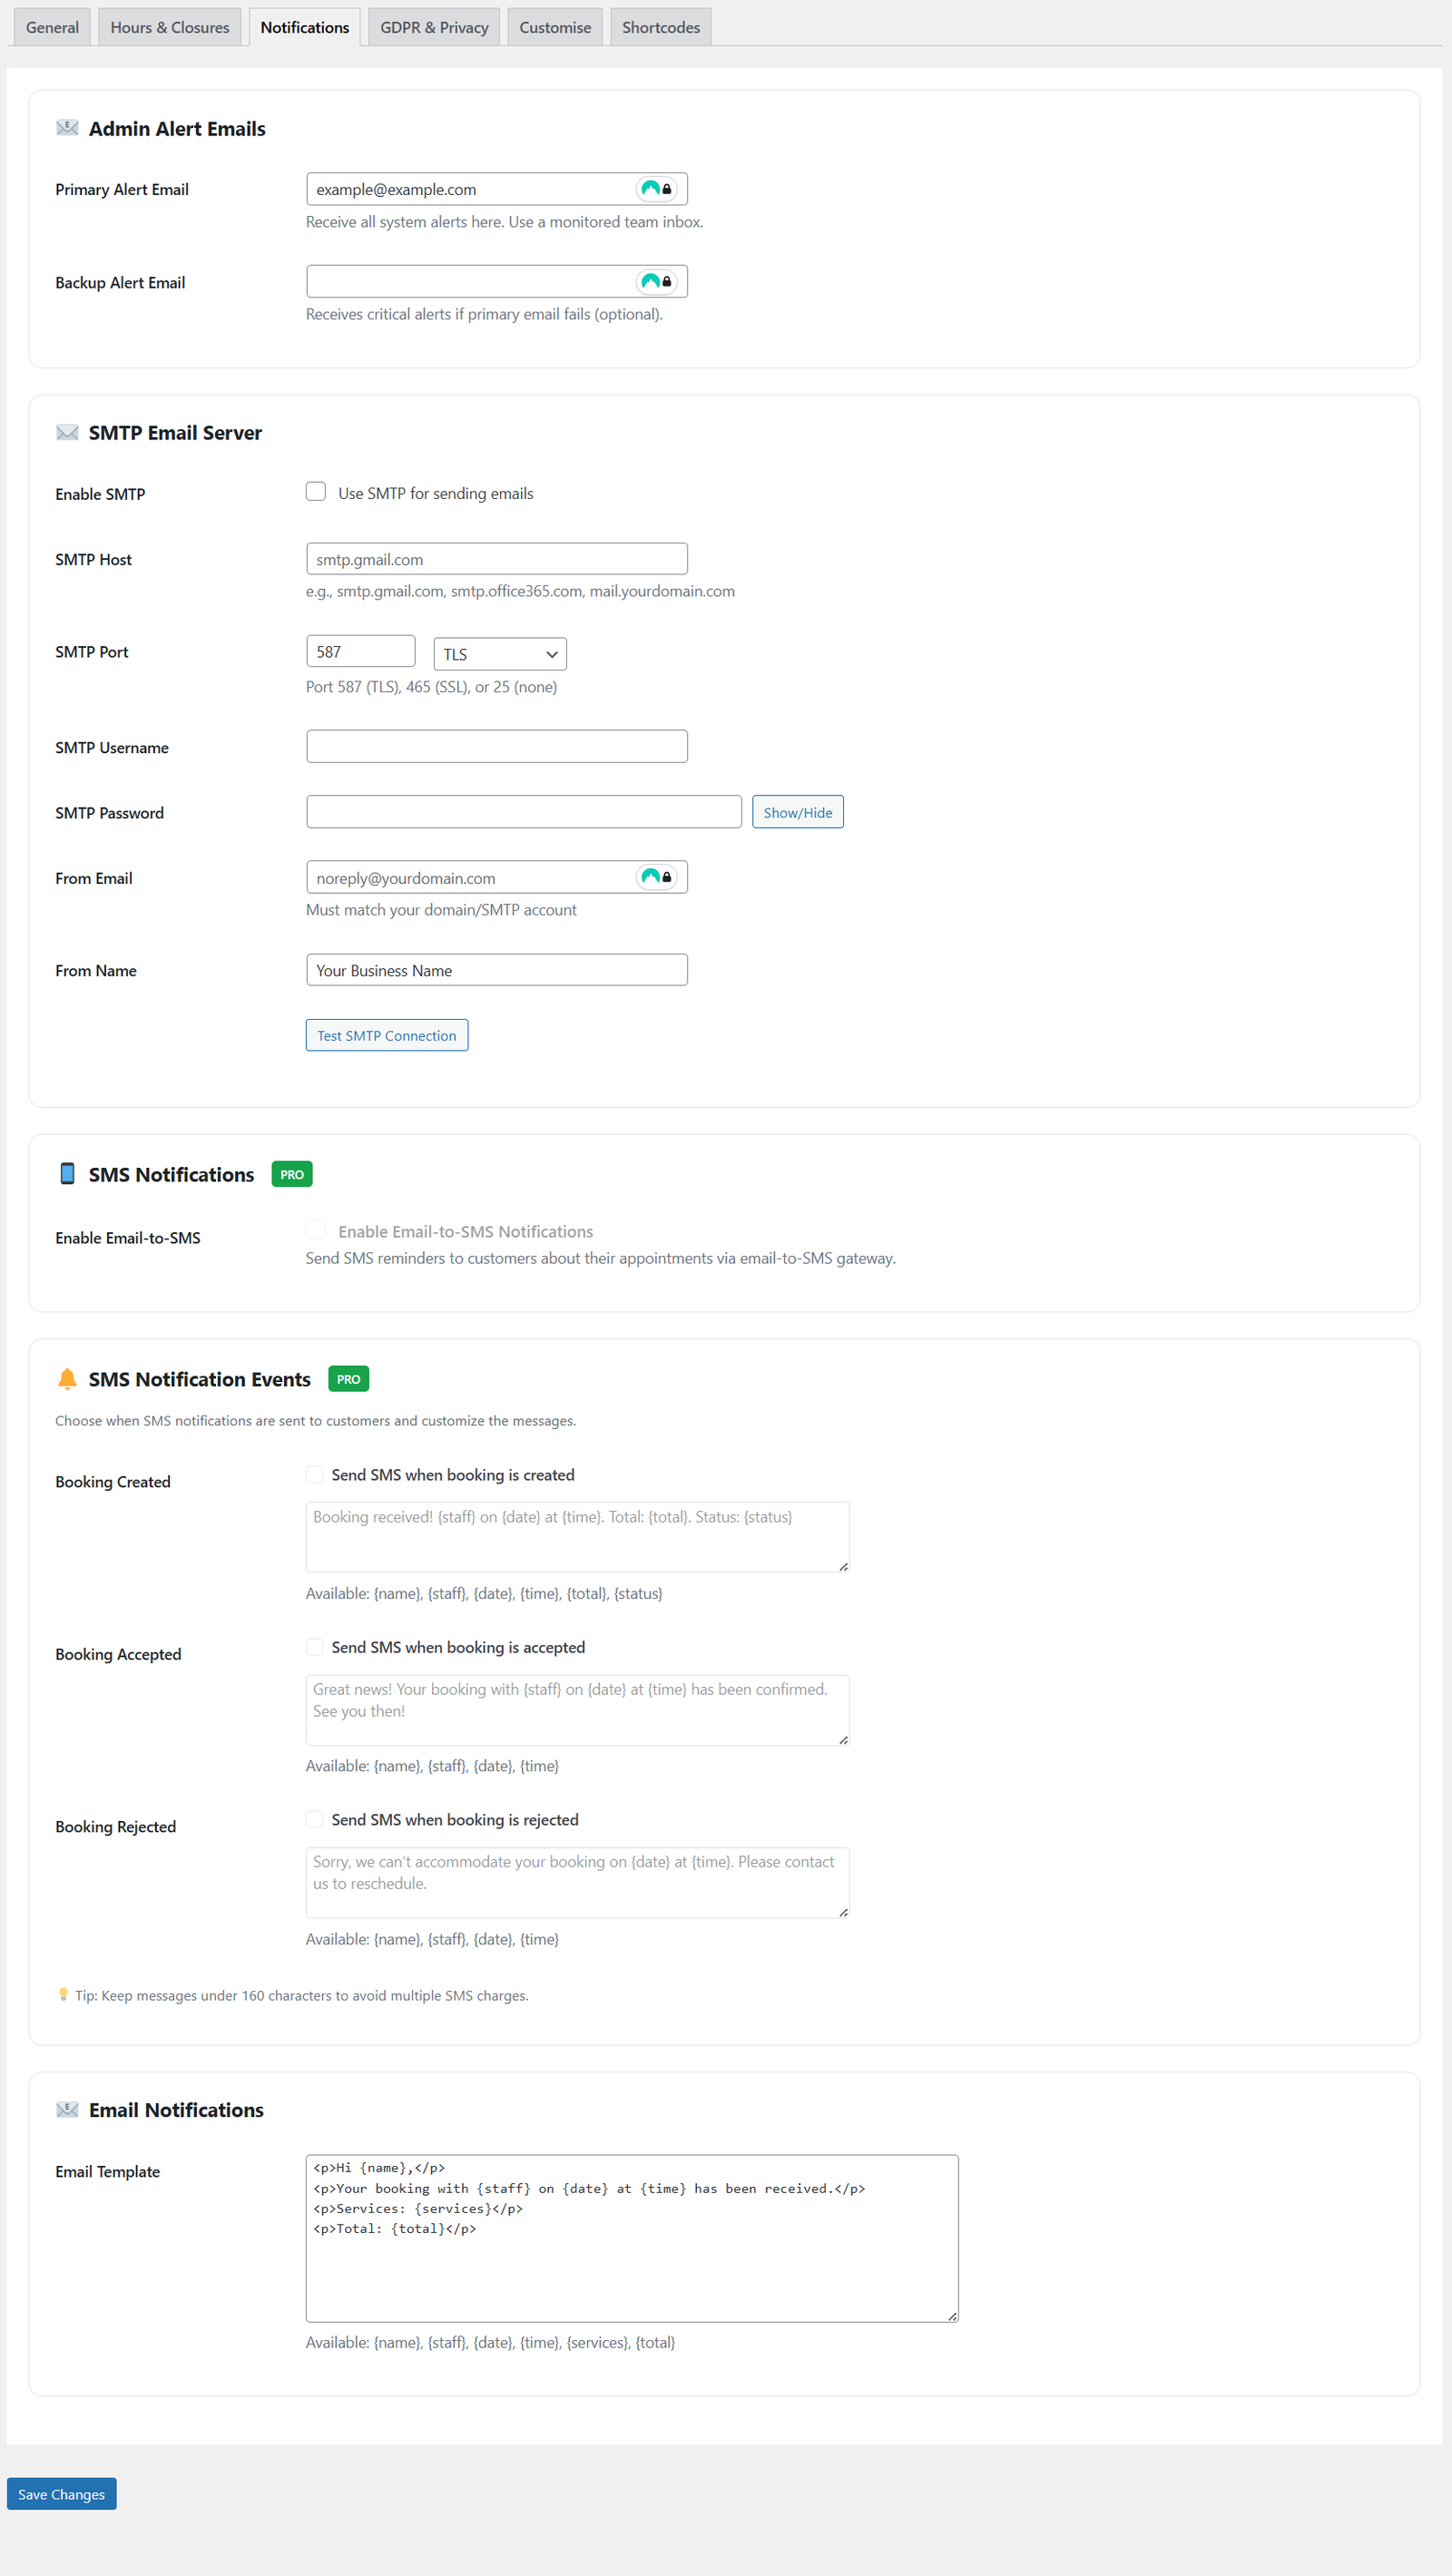
Email notification configuration
- Primary Alert Email
Receive all system alerts here. Use a monitored team inbox or your main business email address. This email will receive notifications for new bookings, cancellations, and other important events. - Backup Alert Email
Receives critical alerts if primary email fails (optional but recommended). This provides redundancy to ensure you never miss important booking notifications.
💡 Best Practice
Use a team inbox or shared email address for the primary alert email so multiple team members can monitor and respond to booking requests even when you’re unavailable.
🔧 Cron Job Setup Required
To ensure email notifications are sent reliably, a cron job needs to be set up on your server. A cron job is a scheduled task that runs automatically at set intervals.
Your hosting provider will be able to supply information on how to set up cron jobs. Most hosting control panels include a simple interface for creating cron jobs.
We recommend using Hostinger for reliable hosting. Here’s their guide on setting up cron jobs: How to Set Up a Cron Job at Hostinger
2 SMTP Email Server Configuration
For more reliable email delivery, you can configure your own SMTP email server instead of using WordPress’s default mail function.
Why Use SMTP?
- Better Deliverability – SMTP servers have better reputation and are less likely to be marked as spam
- More Reliable – Direct connection to your email provider ensures emails are sent
- Authentication – Proper authentication helps your emails reach customer inboxes
- Tracking – Many SMTP providers offer delivery tracking and analytics
SMTP Settings:
- Enable SMTP – Check this box to use SMTP for sending emails instead of default WordPress mail
- SMTP Host – Your email server address
Examples: smtp.gmail.com, smtp.office365.com, mail.yourdomain.com - SMTP Port – The port number for your connection
Common ports: 587 (TLS), 465 (SSL), or 25 (none) - SMTP Username – Your email account username (usually your full email address)
- SMTP Password – Your email account password or app-specific password
- From Email – The email address that will appear as the sender
Must match your domain/SMTP account for best deliverability - From Name – Your business name that appears in emails
Example: “Acme Salon” or “Booking System”
💡 Need Help with SMTP?
Please see your email provider’s documentation for specific SMTP settings. Common providers like Gmail, Office 365, and other email services have detailed setup guides available.
Testing Your SMTP Connection
After entering your SMTP details:
- Click the Test SMTP Connection button
- The system will attempt to send a test email
- Check for a success message confirming the connection works
- If it fails, review your settings and try again
⚠️ Common SMTP Issues
- Wrong port number – make sure to use the correct port for your encryption type
- Incorrect credentials – double-check username and password
- App-specific password required – Gmail and some providers require special passwords
- “From Email” doesn’t match account – use the same email as your SMTP username
3 Email Notification Templates
Customize the email messages sent to customers for booking confirmations and updates.
Available Variables
Use these variables in your email templates to personalize messages:
{name}– Customer’s name{staff}– Staff member’s name{date}– Booking date{time}– Booking time{services}– List of booked services{total}– Total booking price
Example Email Template
Your booking with {staff} on {date} at {time} has been confirmed.
Services: {services}
Total: {total}
See you soon!
✉️ Professional Templates
Use clear, friendly language in your email templates. Include all relevant booking details and consider adding your contact information in case customers need to reach you.
✅ Email Notifications Configured!
Your email notification system is now set up. Both you and your customers will receive timely updates about booking activities. Remember to test your settings by creating a test booking!
What’s Next?
After setting up email notifications:
- Test Your Setup – Create a test booking to verify emails are sent correctly
- Configure SMS Notifications – Set up text message reminders (Pro feature)
- Customize Templates – Personalize your email messages to match your brand voice
- Monitor Delivery – Check spam folders and ensure emails reach customers